Understanding Light in Photography: A Jargon-Free Beginner's Guide
Learn light in photography with this beginner’s guide to soft vs hard light, light direction, color temperature, and simple tips for better photos.
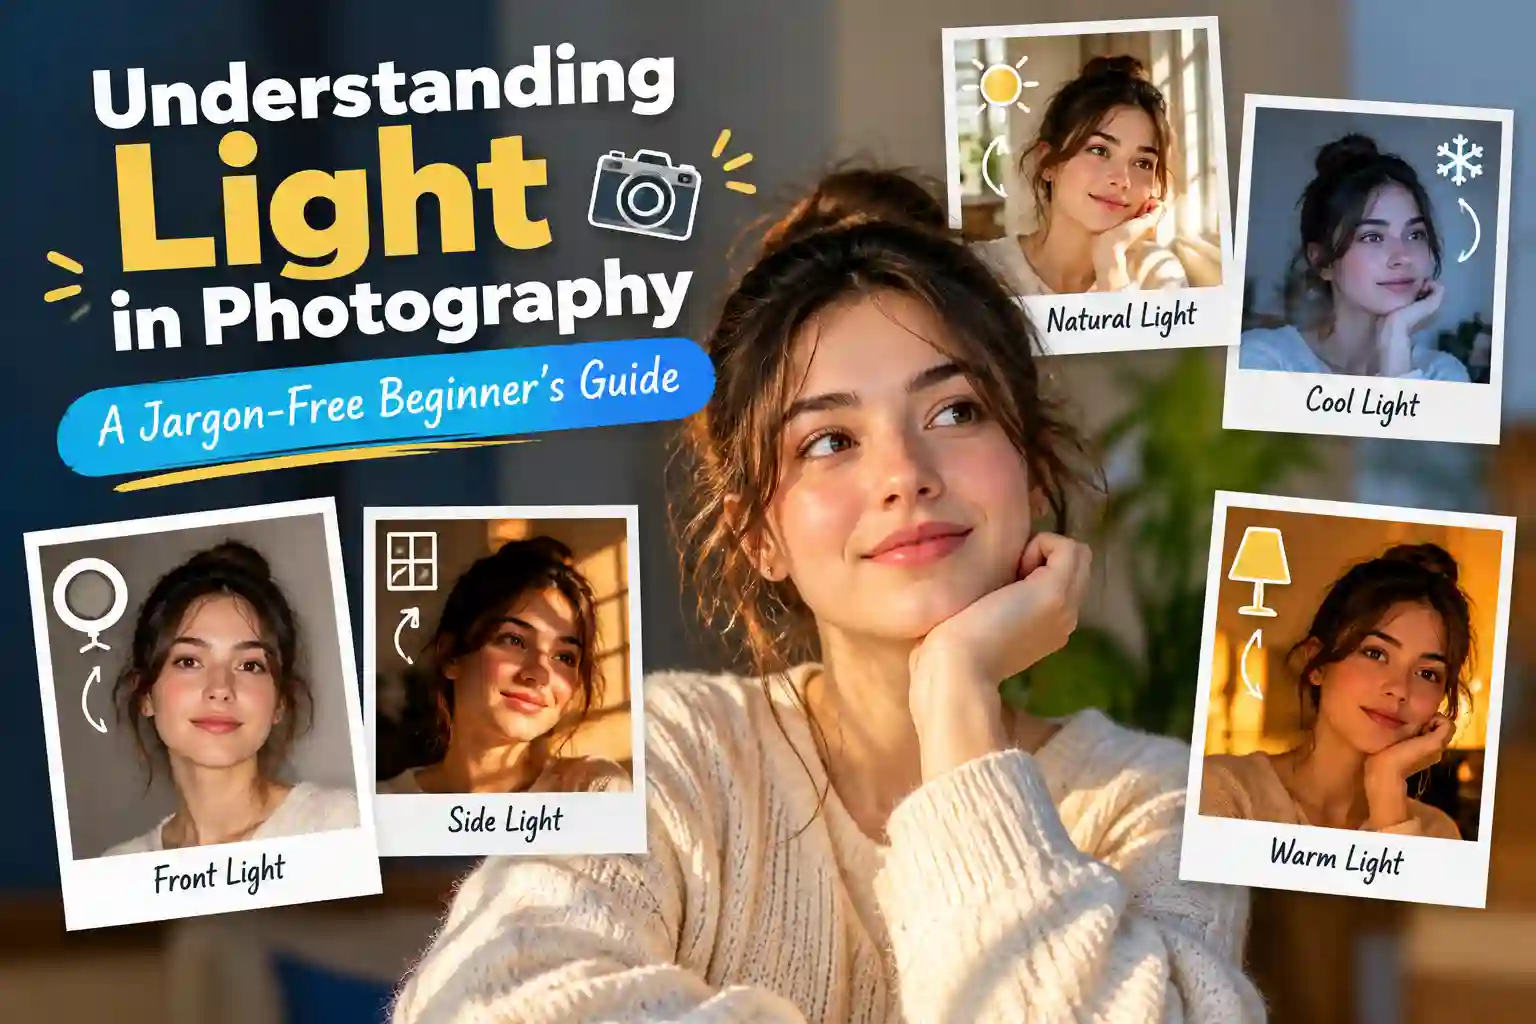
You take a selfie by the kitchen window and your skin glows. Then you walk into the living room for a second shot, and the same face looks flat, tired and a little orange. Nothing changed except the light, and that small change is the whole story of light in photography. Most beginner guides hide it behind words like aperture and ISO, so many people give up before they see the difference. This guide skips that jargon and gives you five simple questions to ask about any light. They work on an iPhone, a Google Pixel or a laptop webcam. Once light in photography makes sense to you, every shot gets better, from a quick Instagram story to a Korean 4-cut strip.
The One Thing That Separates Good Photos From Great Ones
Light is the one thing that separates a good photo from a great one. It decides what the camera can see and how your face looks to everyone else. A cheap phone in great light will beat an expensive camera in bad light almost every time. That is good news, because good light usually costs nothing.
The idea is as old as the word itself. "Photography" comes from two Greek words, phos for light and graphe for drawing, so it means drawing with light. The astronomer John Herschel is credited with coining the word in 1839. That old name still fits today, because a phone or webcam gives you very few settings to change. That leaves light in photography as the main tool you really control.
Light in Photography Explained: 5 Questions to Ask About Any Light
Light in photography comes down to five plain questions. Ask where the light comes from, how soft it is and what color it has. Then ask how much of it there is and how close it sits to you. Answer those five before you press the shutter, and you will know why a photo works or fails.
1. Direction: Where Is the Light Coming From?
The direction of light decides where shadows fall on your face. Those shadows are what make a photo look like a real, three-dimensional person instead of a flat sticker. Side light usually looks best, front light looks flat, and light from straight above gives you dark circles under the eyes.
Front light, like a phone flash or a ring light pointed at you, fills in every shadow. Your nose and cheekbones lose their shape as a result. Side light from a window at about 45 degrees leaves soft shadows on one side of the face. When the shadow leaves a small triangle of light on the far cheek, photographers call it Rembrandt lighting, after the Dutch painter. Backlight comes from behind you, so it can wrap your hair in a warm glow or turn you into a dark silhouette. Overhead light from a ceiling lamp or the midday sun drops shadows into the eyes and under the chin.
You can test this direction of light in photography in one minute. Sit facing a window and take a photo. Then turn your chair a quarter turn so the window is at your side, and your face will gain shape right away.
2. Hardness and Softness: Soft Light vs Hard Light
Soft light vs hard light comes down to the size of the light compared with you. A big source close to you, such as a window or a cloudy sky, makes soft shadows with blurry edges. A small or distant source, such as a bare bulb or the sun, makes sharp, dark shadows.
The sun is huge, but it sits so far away that it acts like a tiny dot in the sky. That is why a clear summer day gives such harsh shadows. When clouds roll in, the whole sky becomes one giant lamp, and the shadows on your face fade into a gentle glow. You can copy this indoors by hanging a sheer curtain over a sunny window. The fabric spreads the light out, much like a photographer's softbox does.
Hard light still has a place in light in photography, because bold shadows look great in street shots and black-and-white portraits. For selfies, family photos and party pictures, though, soft light is kinder to skin and easier for beginners.
3. Temperature (Color): Warm vs Cool Light
Every light has a color, and photographers measure that color temperature on the Kelvin scale. Low numbers look orange, and high numbers look blue. Warm vs cool light changes the whole mood of a photo, so it helps to know which one you're in.
A candle flame and a sunset sit around 1,850 K. A standard incandescent bulb is about 2,400 K, and a "soft white" LED bulb is about 2,700 K, so all of them look warm. Camera flash sits at roughly 5,500 to 6,000 K, while an overcast sky is about 6,500 K. A clear blue sky can reach 15,000 K or more, which is why shade often looks a little blue. Air scatters blue light most, which scientists call Rayleigh scattering.
Your phone tries to fix these colors with white balance, which means the camera guesses what pure white should look like. That guess fails when a yellow lamp and a blue window light you at once, and your skin turns half orange and half gray. The smart move in light in photography is to shoot in light that is already warm. Then add the Vintage filter in TryPhotoBooth, since real warmth looks more natural than fake warmth.
4. Quantity: Bright vs Dim Light
The amount of light decides whether your photo looks clean or grainy. With too little light, your phone brightens the image in software, which adds grain and blur. With too much light, bright skin and white shirts lose their detail and turn into flat white patches.
The fix for a dim scene is to add more light instead of hoping the phone will cope. Move closer to a lamp or open the curtains before you shoot. On an iPhone or a Google Pixel, tap on the face first, and then drag the small sun icon up or down. That exposure slider tells the phone exactly how bright you want the photo to be. Getting this amount right is half the battle with light in photography, and it takes only two seconds.
5. Distance: How Close Is the Light?
The distance between you and the light changes how bright and how soft it looks. If you move twice as far from a lamp, you get only about one quarter of the light. Scientists call this the inverse-square law, and it means a few steps can turn a bright photo dark.
The same rule explains why stepping closer to a window makes the light brighter and softer. The window now fills more of the space around your face. So when a photo looks too dark, move yourself closer to the light before you move the camera. It is the simplest distance trick in light in photography.
Plain-English Lighting Words (Jargon Decoder)
You will meet a few lighting words in YouTube videos and camera apps. Keep this table handy, and you will never feel lost when people talk about light in photography.
| Pro word | Plain meaning |
|---|---|
| Exposure | How bright the photo is |
| Diffused light | Light spread out by clouds or a curtain |
| Key light | Your main light |
| Fill light | A weaker light or bounce that lifts shadows |
| Rim light | Light from behind that outlines your hair |
| White balance | The camera's guess at pure white |
| Kelvin (K) | A number for light color, low is orange |
| Catchlight | The sparkle of light in the eyes |
| Contrast | The gap between bright and dark parts |
Reading Light Before You Shoot
Reading light means taking a few seconds to check it before you lift your phone. This routine is the heart of photography lighting for beginners, and it works in a bedroom, café or backyard party.
- Find the main light. Look for the brightest thing, such as the sun, a window, a lamp or a TV.
- Check where it falls. See if it hits your subject from the front, the side, above or behind.
- Look at the shadows. Sharp shadow edges mean hard light, while blurry edges mean soft light.
- Notice the color. Decide if the light looks warm, neutral or blue, and check for a second color.
- Use it, change it or wait. Shoot if it works, move your subject if it doesn't, or wait for a cloud.
Two free tricks make this routine stronger. A white wall, printer paper or a white foam board below your face works as a reflector that bounces light into dark shadows. Also keep one main light, so switch off the ceiling light when you shoot by a window. Two light colors always fight, which is the most common home mistake with light in photography.
Light Situations That Work Beautifully for Photos (and Polaroid-Style Shots)
Some light situations make almost anyone look good, and most of them cost nothing. You can find several of them in a single afternoon at home. Each one below suits a different mood in light in photography, from soft everyday portraits to the warm, faded look of an old Polaroid.
Golden Hour: Late Afternoon Sun
Golden hour happens when the sun sits about 4 degrees below to 6 degrees above the horizon. Its light turns warm and gold, which is why golden hour is a favorite moment in light in photography. That low sun still gives hard shadows, though, so face slightly away from it or use it as backlight. The blue hour right after sunset gives a softer, cooler mood instead. Our golden hour guide covers timing, apps and settings.
Open Shade on a Bright Day
Open shade is the spot just inside the shadow of a building or tree, where the open sky still lights your face. It gives even, gentle light with no squinting at all. It looks a little cool, though, so a warm filter like Vintage brings the skin tones back to life in your strip. It works well for couples and small groups too.
A Big Window on a Cloudy Day
A large window on a cloudy day is the best free portrait light you will ever find. The clouds soften the light, and the window gives it a clear direction. Sit at about 45 degrees to the glass, and your face will get soft, natural shadows. This is natural light photography at its simplest, and few setups in light in photography beat it, even paid ones.
Candlelight and Warm Lamps
Candles and lamps with 2,700 K warm white bulbs give a cozy orange glow. That glow suits birthday dinners, date nights and late-night photo strips with the Hearts layout. The light is dim, so sit close to the lamp and hold the phone steady with both hands. This keeps blur away while you shoot.
Just After a Rain Shower
The hour after a rain shower brings soft light from the clouds and deeper colors on leaves and walls. Puddles add shiny reflections too. It is one of the most overlooked moments in light in photography, so grab your phone as soon as the rain stops. Wet streets also look moody in city shots.
Midday Sun and Ceiling Lights (and How to Fix Them)
Midday sun and ceiling lights cause the most bad photos, because both shine from straight above. They drop dark shadows into the eyes and under the nose, which is the worst look in light in photography. Outside, step into open shade to escape them. Inside, turn off the ceiling light and use a window or a desk lamp at face height. A sheer curtain also helps when the sun pours straight in.
Best Light for Common Shots: Quick Picks
The best lighting for photos depends on what you shoot, and each type of photo has a favorite light. This table matches common shots with the best light in photography for each one.
| Shot | Best light | Quick tip |
|---|---|---|
| Selfies | Window in front | Face the glass |
| Couples | Golden hour or shade | Light both faces |
| Groups | Overcast day | No one in shadow |
| Product and food | Side window | White paper opposite |
| Night indoors | One warm lamp | Ceiling light off |
| Photo booth strips | One soft window | Same light every frame |
Lighting for Phone and Laptop Photos
Most beginners shoot on a phone or a laptop webcam. Both have small sensors that need plenty of light. These quick fixes help you get the most from the light you already have at home or at work.
Phone Camera Light Fixes
A phone camera works best when you tell it what matters. Tap on the face, so the phone sets focus and brightness for the person instead of the sky. Then drag the exposure slider down a little if a bright window washes out the skin. In dim rooms, Night mode on iPhone and Pixel blends several shots, so hold still while it works. Wipe the lens with a soft cloth, because a fingerprint spreads light into a hazy glow. Skip digital zoom in low light too, since it only makes grain bigger. These small habits fix most phone problems with light in photography.
Webcam and Laptop Light Fixes
Webcam lighting is easy to fix once you know the light should face you. Sit facing a window, or put a desk lamp just behind the laptop so it shines toward your face. Never sit with a bright window behind you, because the webcam will turn you into a dark shape. Turning your screen brightness up adds a little soft fill light as well, which also helps on Zoom calls. Webcams struggle with light in photography more than phones do, so this setup makes a big difference to your strips. Our laptop photo booth guide shows how to set up a full session.
Ring Light vs Window: Which Wins?
A ring light helps when you film TikTok videos at night or have no window nearby, since it gives steady, even light. It also flattens your features and leaves a round halo in your eyes, so it can look a bit artificial. If you use one, raise it slightly above eye level and step back a little, so the light looks less flat. When you can, the window wins, because its light is softer, comes from one side and costs nothing.
Why Does My Photo Look Dark, Orange or Flat? (Quick Fixes)
Most lighting problems have a simple cause and a fix that takes about ten seconds. If you wonder why your photos look dark or why your photos look orange, find the problem below. This table covers the most common mistakes with light in photography.
| Problem | Likely cause | 10-second fix |
|---|---|---|
| Dark face, bright background | Window behind you | Turn to face the light |
| Dark circles under eyes | Ceiling light | Use a lamp at face height |
| Orange skin | Warm 2,700 K bulbs | Shoot by a window |
| Grainy or blurry | Too little light | Move closer to the light |
| Flat, shiny face | Flash straight on | Move the light aside |
| Half orange, half blue | Mixed light colors | Turn one light off |
| Harsh lines under nose | Midday sun | Step into open shade |
Applying Light Understanding to Photostrips
A photo strip looks best when every frame shares the same light. The eye then reads the strip as one set instead of four random pictures. If one frame has warm lamp light and the next has blue window light, the strip looks messy, even when each photo is good.
The easy fix is to pick one spot with one main light and stay there for the whole session. Layout B, the Korean 4-cut strip made famous by Life Four Cut booths in Seoul, works well here. All four shots happen within seconds, so the light has no time to change. If you must mix light, put the same filter on every frame, such as Vintage with its date stamp. This care matters even more when you print. The 300 DPI export shows every patch of uneven light, whether you print on photo paper at home or on a Canon SELPHY.
Our Test: One Face, Four Lights in a 4-Cut Strip
To show how much light in photography changes one face, we planned a single 4-cut strip of the same person in four kinds of light. The four frames use a side window, a ceiling light only, a desk lamp and a bright window behind the subject. Every frame uses the same phone, the same pose and no filter, so the light is the only thing that changes. Try the same four lights at home and share your own strip on Instagram or Pinterest to compare results.
[PLACEHOLDER: add real test results. Describe what each frame shows: which looked softest, which looked orange and which became a silhouette.]
See the Light: Your Next Step
You now know the five questions, the free tricks and the quick fixes, so the next step is practice. For one week, notice the light in every room you enter. Ask where it comes from, how soft it is and what color it has, even when you are not taking a photo. You will soon see why a café table by the window feels so photogenic, and why the hallway never does.
That small habit will train your eyes faster than any course on light in photography. When you are ready, open the free online photo booth on your phone or laptop. Sit by your best window, shoot a Layout B strip, and see the difference for yourself.
Frequently Asked Questions
What is the best time of day to take photos?
The best time for warm, flattering photos is the hour after sunrise or the hour before sunset, when the sun sits low. An overcast day is also great, because clouds spread soft light that works at any hour. Midday sun is the hardest light in photography to work with, since it drops shadows into the eyes.
Can editing fix bad lighting?
Editing can fix some problems, such as skin that looks too orange or a photo that is slightly dark. It cannot add shape to a flat face or remove heavy grain from a dark shot. Getting light in photography right before you shoot always beats fixing it later.
How do I use light well at events or parties?
At events, good light in photography comes from finding the best spot in the room instead of shooting where you stand. Move people near a big window or a warm lamp, and keep them out from under ceiling lights. Set up your photo booth corner in one spot with steady light all evening.
Why do my indoor photos look orange or yellow?
Indoor photos look orange because most home bulbs are warm, around 2,400 K to 2,700 K. Your phone cannot fully correct that color. Shoot near a window during the day, switch to a daylight bulb, or pick a cooler filter so skin looks natural.
What is the best lighting for selfies at home?
The best lighting for selfies at home is a large window in front of you or slightly to one side. Face the glass and turn off the ceiling light. Then hold a white sheet of paper below your chin to bounce light into the shadows under your eyes.
Is a ring light better than a window?
A window is usually better, because its light is bigger, softer and free. A ring light wins at night or in rooms without windows, since it gives steady light. It can flatten your face, though, and it leaves round halos in your eyes.
Why do my photos look dark when the room looks bright?
Your eyes adjust to a room much faster than a phone sensor does. A room can look bright to you but dim to the camera. A bright window behind you also tricks the phone into darkening the photo, so tap your face and raise the exposure slider.
How do I take good photos in a dim room at night?
Move close to the brightest lamp in the room and face it, because distance matters a lot. Turn on Night mode and hold the phone with both hands or rest it on something. Avoid zoom too, since it makes grain much worse in low light.
Keep Reading
Want more ways to take great photos at home? Read our golden hour guide, our photo booth filters guide and our laptop photo booth guide next, and try one idea tonight.
Ready to try this in your browser?
Launch our free 3D studio, test out vintage filters, and save your photo strip instantly.