Halloween Photo Booth Ideas: Filters and Setups That Actually Look Creepy
Discover Halloween photo booth ideas with creepy filters, dark lighting, spooky backdrops, fun poses, and simple setups for unforgettable photos.
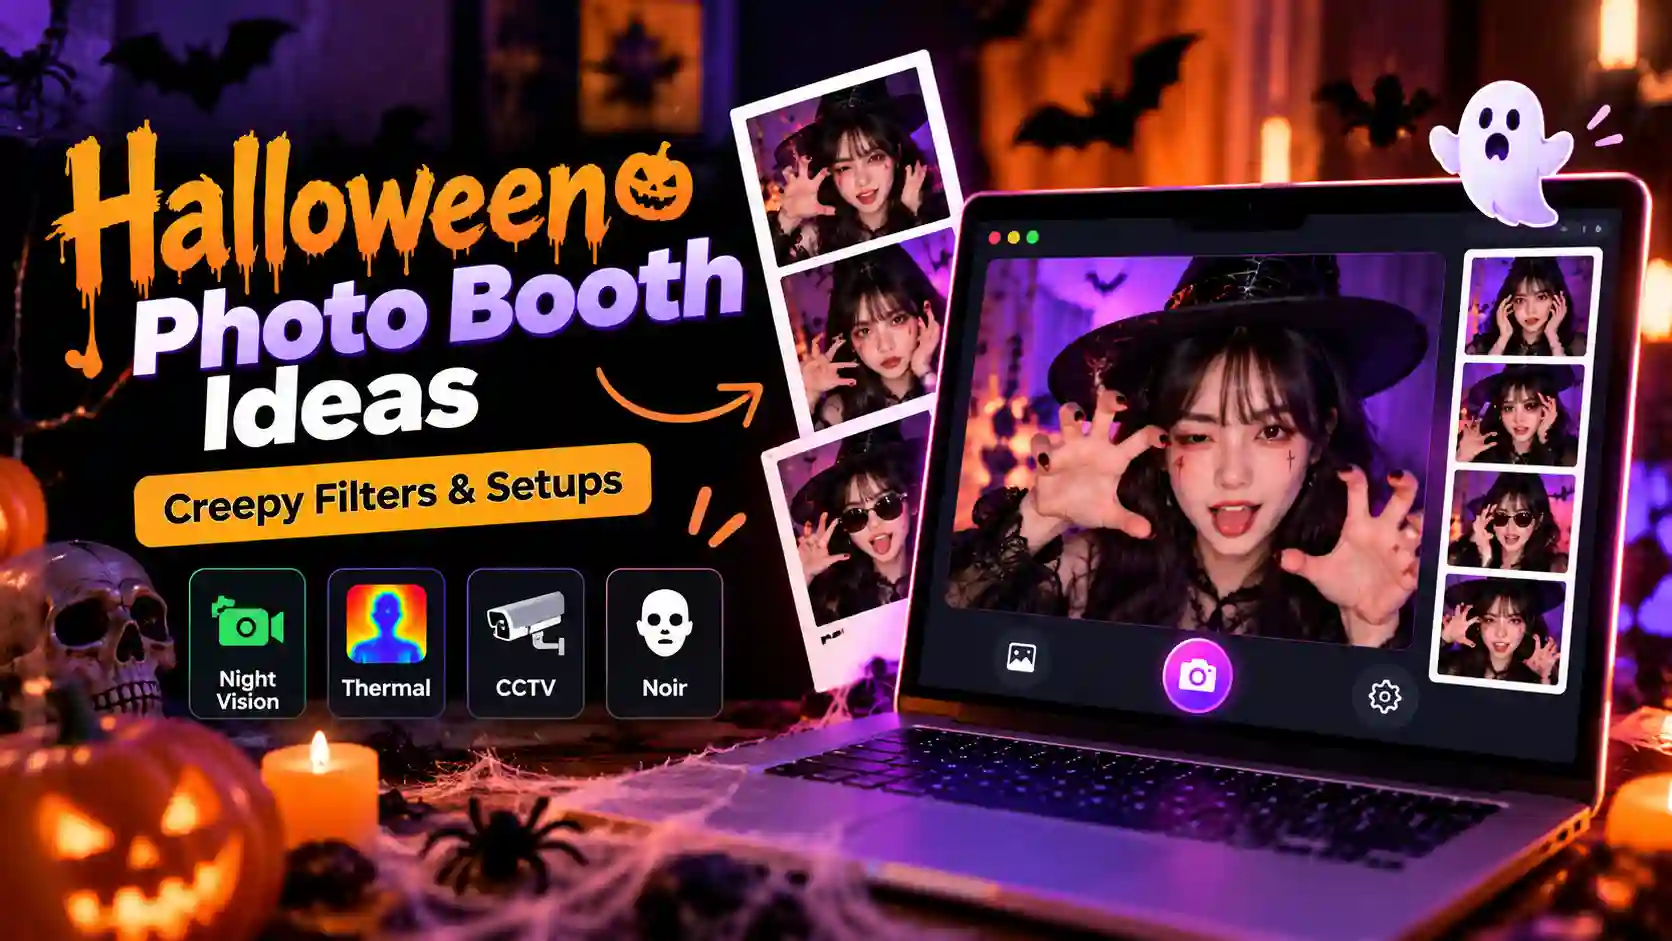
Most Halloween photo booths have the right decorations but still produce ordinary-looking pictures. The room may be dark, the costumes may be great, and the props may look spooky, yet the final photos can feel more funny than creepy. The trick with good Halloween photo booth ideas is to control what the camera sees, not just what guests see in the room. The best Halloween photo booth ideas use controlled lighting, the right filter, simple poses, and a background that gives the photo some depth. You do not need an expensive setup either. With a phone, webcam, dark backdrop, and one carefully placed light, you can create photos that feel like found footage, security recordings, or a scene from a horror movie. A simple PhotoBooth setup can give you the right starting point.
The Dark Room Problem, Solved First
A camera in a dark room does the only thing it can: it amplifies. That brings noise, color speckle into the shadows, and a general muddiness that no filter can completely fix. You do not need to flood the booth with light. You need one useful source in the right place.
- A colored bulb in a nearby lamp. Red or deep green gives the camera enough to work with while keeping the room dark.
- A phone torch bounced off a wall or ceiling. This softens the light instead of putting a bright spot directly on the face.
- Candles or fairy lights close to the subject. They provide a small amount of light while already looking like part of the Halloween scene.
- A floor lamp pointing upward. Underlighting looks strange on purpose, which makes it useful for horror portraits.
Keep the overhead light off. It spreads light across the whole booth, removes the useful shadows, and makes the scene look more like a normal party.
Why Dark Does Not Always Mean Creepy
The goal is not to hide the subject completely. If the face, mask, or costume disappears into black, there is nothing left for the camera to capture. Leave some detail visible and let the rest fall away. A half-visible face can feel unsettling; a completely black face usually just looks underexposed.
Test the Booth Before Guests Arrive
Take a few shots before the party starts. Check the face first, then the costume, then the background. If the important details are visible and the background still feels dark, stop adjusting the light. That is the point where you should start testing filters.
The Four Filters That Carry Halloween
A good Halloween filter should change the mood without hiding everything in the original photo. The strongest choices are Night Vision, Thermal, CCTV, and Noir, because each one creates a very different kind of horror.
| Filter | Best for | Visual effect |
|---|---|---|
| Night Vision | Zombies and monsters | Green, low-light appearance |
| Thermal | Groups and unusual costumes | Heat-map colors |
| CCTV | Masks and surveillance scenes | Security-camera feeling |
| Noir | Gothic costumes | High-contrast black and white |
Night Vision: Best for Found-Footage Horror
Night Vision gives the picture a green monochrome appearance that immediately feels different from an ordinary party photo. It works particularly well with zombies, monsters, masks, and costumes that already have strong shapes. The best way to use it is to keep the room fairly dark while maintaining enough light for the camera to see the subject. Try having guests stare directly into the lens instead of giving a normal smile.
For a stronger effect, use a four-frame strip. The person can start still, move closer, change their expression, and finish with their face close to the camera.
Thermal: Turn People Into Something Unnatural
Thermal filters replace normal colors with a heat-map style image. Faces, hands, and bodies can appear in unusual colors, which makes even a normal costume feel strange. This filter is especially useful for groups because different people create several areas of contrasting color across the frame. It can also work well when the costumes have large shapes that remain visible after the original colors are replaced.
Keep the pose simple. The filter already creates visual interest, so there is no need to fill the frame with extra props.
CCTV: Make the Booth Feel Like a Horror Recording
CCTV is useful when you want the photo to look like a strange security-camera capture. A little grain, a fixed-looking frame, and an emotionless pose can make the image feel like someone has accidentally recorded something they were never supposed to see. Masks work particularly well here. Ask one person to face the camera while another looks toward the side, as if they have noticed something outside the frame.
A simple date or time overlay can strengthen the surveillance feeling if your photo booth software supports it.
Noir: Gothic Horror Without the Clutter
Noir removes most color and puts attention on contrast, shadows, faces, and silhouettes. That makes it a natural choice for vampires, ghosts, gothic costumes, and dramatic makeup. Side lighting is especially effective with Noir because the darker areas of the face become part of the composition. Instead of filling the background with Halloween decorations, let the shadows do some of the work.
A close portrait can be stronger than a wide shot here because the viewer notices the expression, makeup, mask, or eyes.
Other Filters Worth Trying
Glitch and VHS effects can work when you want a more modern digital-horror feeling. Grain can make a simple image feel older, while motion blur can make movement look less predictable. The important thing is to choose one visual direction for a photo strip. Combining several heavy effects in the same picture usually creates clutter instead of tension.
Setups That Photograph Well
A creepy photo booth works better when guests have something to do. Asking everyone to stand in front of the camera and smile produces the same ordinary party photo, even when the room looks frightening. Give each person a simple action or sequence instead.
The Costume Reveal
Start with the guest partly hidden from the camera. In the second frame, have them turn toward the lens, and in the third, reveal the costume fully. The final frame can be the character pose. A vampire can stare directly into the camera, a zombie can lean forward, and someone wearing a mask can suddenly move close to the lens. A four-cut strip works particularly well because the sequence becomes part of the photograph.
The Interrogation
Put one person on a chair and use a single light from one side or slightly above them. Keep the rest of the room dark and ask the subject to look serious rather than smile. CCTV and Noir are natural choices for this setup. A flashlight placed on a nearby table can also become part of the scene without requiring another decoration. The strongest version is usually simple. One chair, one light, one person, and plenty of shadow can look more convincing than a booth packed with props.
The Group Haunting
For groups, avoid putting everyone in one straight line with the same expression. Instead, create different heights and positions so the picture has some depth. One person can look directly at the camera while another looks toward the side. Someone in the back can remain partly hidden behind another person, while the person in front leans slightly toward the lens. Thermal works well for this setup because the unusual colors give the group photo an immediate visual difference. Night Vision can also work when the costumes are dark and dramatic.
The Slow Approach
This setup works because the distance between the person and camera changes with every frame. Start with the person several steps away. Move closer for the second shot, closer again for the third, and finish with the face filling much of the final frame. CCTV or Night Vision can make the sequence feel like footage from a strange encounter. The key is to keep the movement deliberate rather than simply walking toward the camera and smiling.
Backdrops Worth the Effort
A Halloween backdrop does not need to look complicated. It just needs to give the subject somewhere interesting to appear without stealing attention from the costume or face.
The reliable options are simple:
- Black fabric. A sheet, curtain, or piece of dark cloth works surprisingly well. It disappears behind the subject and lets the face, mask, or costume carry the frame.
- A dark doorway. Shoot toward an unlit room and place the subject inside the doorway. The darker space behind them adds depth without needing a printed backdrop.
- Cobwebbing over a plain wall. Keep it loose rather than covering every inch. A few strands catch the light and make an otherwise empty wall feel abandoned.
- Fairy lights behind a sheer curtain. Keep the lights slightly out of focus so they become soft points of light behind the subject instead of another decoration competing for attention.
Leave some space between the person and the backdrop. That small gap gives shadows somewhere to fall and stops the subject from looking pasted onto the background.
Frames and Layouts That Make the Horror Work
The frame should match the type of shot you are trying to create. A four-cut strip is ideal for sequences such as the Costume Reveal and Slow Approach because the viewer can see the action develop from one frame to the next. A single portrait works better when the main attraction is a face, mask, makeup, or expression. Noir is particularly effective in this format because there is less background competing for attention.
Wider layouts make more sense for the Group Haunting because several people need enough room to show their costumes and positions. You can also leave some empty space around the subject. A large dark area beside or behind a person can create a feeling that something might be hiding just outside the frame. As a simple rule, match the layout to the filter. Use sequences for Night Vision, surveillance-style framing for CCTV, close portraits for Noir, and wider group shots for Thermal.
Want to experiment with a different photo-strip style? Our guide to the Y2K photo booth aesthetic shows how soft detail, casual expressions, and four connected frames can create a completely different mood.
Props: Fewer Than You Think
A photo booth does not need a pile of Halloween props to look frightening. In fact, too many objects can make the final picture look like a party decoration photo instead of a horror scene. Choose props that give people something to do. A flashlight can be held under the face, a mask can hide part of the head, and a candle or lantern can become the only visible light source. A chain, old picture frame, mirror, or small amount of fake blood can also work when it supports the pose.
The best props create an action. Looking through an old frame, holding a flashlight toward the camera, hiding behind a mask, or staring into a mirror gives the guest something to perform. Avoid filling every empty area with pumpkins, signs, balloons, and bright decorations. A little empty space often makes the picture feel more unsettling.
When to Run It During the Party
The timing of your photo booth session can affect the quality of the pictures. During the first 90 minutes, costumes and makeup are usually at their best. Wigs are still in place, masks have not become uncomfortable, and face paint has had less time to smudge. This is the best time for Costume Reveal shots and individual portraits. Later in the party, more guests may be available for group photos, so this is a good time for the Group Haunting setup and wider Thermal shots. Toward the end, you can experiment with unusual poses, glitch effects, motion blur, and stranger filter combinations. At that point, the goal can shift from polished costume portraits to unpredictable party memories.
Five Mistakes That Make Halloween Photos Look Bad
Making the Room Completely Dark
If the camera cannot see the subject, the picture will look underexposed rather than frightening. Keep enough controlled light on the face and costume while allowing the background to remain darker.
Using Direct Flash on Every Shot
A strong flash from the camera position can flatten the face and remove the shadows that create the horror effect. Try moving the light away from the camera instead.
Putting the Subject Against the Backdrop
When someone stands directly against the background, there is little separation between the person and the scene. Move them forward and let the light create some shadow behind them.
Using Too Many Props and Effects
Every additional object competes for attention. If the face, costume, filter, and backdrop are already doing the work, adding five more decorations will usually make the image weaker.
Making Everyone Pose the Same Way
A row of people giving identical smiles does not feel creepy. Give each person a slightly different direction, expression, height, or position so the group feels less predictable.
A Simple Halloween Photo Booth Setup You Can Copy
Want to recreate the look without overthinking the setup? Use this basic arrangement.
- Backdrop: Hang a black sheet and leave about a few feet of space in front of it.
- Camera: Put the phone or webcam at roughly face height and keep it steady.
- Light: Place one small lamp slightly to the side of the subject.
- Room: Turn off the main overhead light and keep the rest of the area dim.
- Filter: Start with CCTV for a surveillance look or Night Vision for something more eerie.
- Pose: Use one simple action, such as turning toward the camera or moving closer between frames.
Take one test shot before bringing everyone in. If the face and costume are visible while the background stays dark, the setup is ready. That's all you need. The creepy effect should come from the combination, not from adding more equipment.
Using a Laptop for Your Photo Booth
A phone is not the only way to create Halloween photo booth pictures. A laptop with a built-in or external webcam can also work well, especially when you want a larger screen for checking the camera view and choosing poses.
Planning to use a laptop? Our guide on using a photo booth on a laptop explains how to create a simple webcam-based setup without needing a traditional photo booth.
Frequently Asked Questions
How do you make a Halloween photo booth look creepy?
Keep the background dark, use controlled side or low lighting, choose one strong filter, and give guests poses that create movement or tension. A simple setup usually looks better than a crowded one.
What is the best filter for Halloween photo booth pictures?
Night Vision, Thermal, CCTV, and Noir are strong choices because each creates a different horror style. Choose the filter based on the costume, lighting, and type of photo you want.
How do you light a Halloween photo booth?
Use one controlled light near the subject rather than making the entire room bright. Side lighting creates stronger shadows, while a low light can create a more dramatic horror effect.
Should a Halloween photo booth be completely dark?
No. The room can feel dark, but the camera still needs enough light to capture faces and costumes. Controlled darkness gives you shadows without losing important details.
What backdrop works best for creepy Halloween photos?
Black fabric is an easy choice because it keeps attention on the subject. A dark doorway, cobweb texture, or softly lit sheer curtain can also create depth without making the image too busy.
How many props should a Halloween photo booth have?
A few useful props are usually enough. Choose objects that create an action or change the composition, such as a mask, flashlight, candle, chain, or old frame.
What is the best layout for Halloween photo booth pictures?
Four-cut strips work well for movement and transformation sequences, while single portraits suit masks and makeup. Wider frames are better when several people need to fit comfortably.
How do you take Halloween photos in a dark room?
Keep the room dim but place one controlled light near the subject. Take a test photo before guests arrive and adjust the light until the face and costume are visible without brightening the whole background.
How can I make Halloween photo booth pictures look less funny and more scary?
Reduce bright decorations, avoid identical smiling poses, and use shadows more deliberately. A serious expression, uneven positioning, and a darker background can change the mood immediately.
What filter works best for a group Halloween photo?
Thermal is useful when you want an unusual group image with strong color differences. Night Vision can also work well when the group is dressed as zombies, monsters, or other dark characters.
Keep Reading
The best Halloween photo booth ideas are not the ones with the most decorations. They are the ones that make the camera capture something that feels unusual, shadowy, and slightly uncomfortable. Start with the lighting, choose one filter, give people something to do, and let the darkness around the subject do the rest.
Ready to try this in your browser?
Launch our free 3D studio, test out vintage filters, and save your photo strip instantly.